This post is going to be one long and complicated one, I suspect. Coding a blog is no simple task, and what with recent technologies, has sort of become an outdated mode of creation.
Today, sites like blogspot, wordpress, and wixsite have created an easy drag and drop formula to creating blogs and websites. This is great for new users! However, it also means more restrictions and limitations when it comes to forming the blog/website you envision.
For this post, I’m going to go over the tools I used to create my blog and elements on my homepage that have helped to enable me to create the website I have as of today, July 2019. I will be going over:
-
my blogging platform (host)
-
The template for my blog’s overall design
-
How I set up my email list
-
How I created a pop up for my book
-
How I created slides on my homepage
-
And lastly, smaller add-ins and the websites I used to help me in coding
This post is going to be a heavy one with a lot of bulk and information. If you’re serious about making your website how you envision it, stick around.
-
My blogging platform
When creating a website or blog, you need to have a host platform. That can be blogspot (though google), wixsite, wordpress, or any other hosting platform. I highly recommend that you do your research before choosing one. Some hosts are free, others charge fees. Some are more drag and drop, others are more hands on. Some offer really cool templates and new-user elements, some are more limited. Do. Your. Research.
I use blogger/blogspot as my host platform. This is for a number of reasons. But you put it simply:
-
blogger is through google and has easier access for viewers as far as viewing my articles/commenting on them (many people have gmail or google profiles which makes this possible)
-
Blogger offered more leeway for my blogging needs (I needed more space to explore and less drag and drop restrictions)
-
Blogger was the first host I found and I didn’t do research before hand. Though, I stick to what I start and refused to give up on my blogspot website!
Did you read that last one? I didn’t do any research before jumping into a blogging platform. In the end, it all worked out beautifully for me. However, I do wonder if I would have chosen something different had I done more research on hosting platforms.
I use blogger through google and I love it. It works for me. Their platform is easy for me to navigate and control. I don’t feel overwhelmed with a ton of options (because they’re aren’t many) and I feel more at ease with my own creativity.
In the beginning, I had a free account under the domain am.wils.blogspot.com (or something like that). Blogger does provide free accounts, however, after doing some research, I found it was better to own your domain. So, I ended up paying $12 a year for the domain amelia-j-wilson.com. And I’m satisfied with that!
My blog used to be titled Blog to Being and you can read about the reasons why here. However, I’ve since changed it to just my name as I want this to be my website to connect all of my crafts. (I might write a post on this later).
At first, blogger was sort of restrictive for me. They only provide so many templates. What with my lack of knowledge in coding, it mean I was restricted to use one or maybe 10 templates that didn’t speak to me.
Blogger/blogspot is a great platform if you know how to code. Otherwise, it kind of hinders you.
 |
| click here to view |
-
The template for my blog’s overall design
As I mentioned above, blogger didn’t really provide an assortment of templates. If you look below, there is a picture showcasing just how limiting the site can be.
In the beginning, I used the Picture Window template for my blog. It was fine, but it didn’t resonate with me. So, I did some research on how to fix it.
I came across Gooyaabi Templates. This site is AMAZING! You can download or buy blog/website templates and completely renovate your blog/site to look how you want. There are over 100 different templates for websites of all kinds! I found this website while I was on vacation in Charleston, SC. I don’t really know how or why, but I instantly downloaded the Zip for the format I wanted and began to code my blog as necessary.
Below is a link to the template I used/am still using.
I’ve since been on Gooyaabi to browse more templates and, I’ll be honest, sometimes I want to record my entire site to make it “prettier.” I don’t know if I’ll attempt that though. It took me almost a month to get the code to work without flaws. A WHOLE MONTH!
I didn’t have many views at the time, so it made tearing apart my website without anyone knowing fairly stress free. Fairly is the key word there. I was super stressed trying to code that thing! Gooyaabi gives you a generic template for a website. However, you still have to go in and re-code any existing articles, pop ups, colors, pictures, links, ect. to your website. And that is where it can get tricky.
This might have been one of the hardest parts on coding my blog. It required a lot of googling on “how to code a footer to your blog,” “how to code different colors to a gooyaabi template,” “how to code an html link to your blog” etc.
I wish I could link all of the amazing and helpful sites/YouTube videos that helped me learn to code my site, but those links have been lost to the depths of my internet history.
-
How I set up my email list
Blogger doesn’t have a very adaptable emailing list. I don’t know how to word it, but it’s a touchy system with inaccuracies that affect the performance of your email lists.
I use mailchimp as my email list host. Mailchimp is a great starting platform for bloggers. It’s free and can support up to 10,000 emails to 2,000 subscribers a month. Again, great for smaller blogs and beginners. If your blog reaches more than 2,000 subscribers, you might need to look elsewhere.
For me, personally, mailchimp is fine. They do offer paid plans, and I’m not entirely sure when or if I’ll ever be ready for that.
There are number of emailing list platforms, just as there are website platforms. Here is a link with a list of alternative mailing lists.
Mailchimp has a nice drag and drop set up for creating emails/ads/campaigns. I use Mailchimp for my poetry page, for example, as well as for my newsletters. I don’t mind the drag and drop on mailchimp as, though a tad limited, I’m not too worried about limitations on my emails. It’s a bit frustrating for my poetry page, but I’m not mad at how it turned out.
Interested in getting updated on new posts, content, and more? Sign up HERE to subscribe to my email list and be a part of all the hubbub today!
-
How I created a pop-up for my book
Let’s get back to coding. Alright, so, pop-ups kinda stink. But so does taking up a lot of space on my sidebar to include all of the interesting goodies I have to offer! I decided to make a pop-up for my book on my blog (check out my book here!). This was mainly because I WANT people to know about my book, and I WANT people to at least check it out.
The little box on the sidebar (desktop) or at the bottom of my feed (mobile) wasn’t doing a very good job at grabbing attention. So, I decided enough is enough and I need a pop-up.
I made my pop-up through a program called POWR. They specialize in helping bloggings code unique elements to their websites. It was really simple to use. I just plugged in the information I wanted and then copied and pasted the code to the HTML of my blog.
It was easy as that!
-
How I created slides on my homepage
This one was a bit trickier. I went through a bunch of different apps, programs, and software until I came upon one I could handle. And to be honest, I’m still not “in love” with this one.
Again, I used POWR’s drag n’ drop, simple website tool method. Previous to POWR I used another website (I’ll link in #6) that specifically covers multi sliders and slideshows. POWR was the easiest for me. Again, I just plugged in my info, copied the link, and pasted it to my HTML.
 |
| click here to view |
-
And lastly, smaller add-ins and the websites I used to help me in coding
This paragraph isn’t even going to be a paragraph. It’s going to be a link to websites I used to help me build my blog how I wanted.
None of these are sponsored and I am not making a commission off of any links. This is purely from me to you to help you build and code your website/blog!
-
https://www.w3schools.com/default.asp (my favorite!)
Of course, these are all for coding. Some website hosts like WordPress and Wixsite don’t require any coding. I just prefer to be more organic with my blog.
The sites above have helped me put pop-ups, slideshows, footers, ads, responsive buttons, and extra tabs into my blog.
Coding a blog is an adventure. It can be frustrating, exciting, irritating, and thrilling. These are the sources I used to create my website to look how I envision.
If you like this post, check out some similar posts of mine below:
|
|
Or, subscribe to my monthly newsletter to get some cool deals and be updated about sweet content!
Feel free to leave a comment below or email me with questions or concerns you may have at info.amelia.wilson@gmail.com
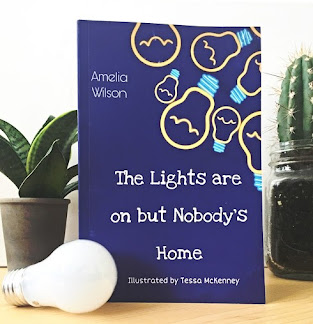
Also, check out my poetry book, The Lights are on but Nobody’s Home, available now on amazon for $9.99!
Disclaimer: All of the views and opinions in this post are solely my own and are not sponsored.
Thanks again


0 responses to “How I coded my blog to look how I want”
Great blog! Please keep on posting such blog.web design in Minneapolis